Recipe: Dentists Won’t Tell You This – 8 Hacks to Do Teeth Whitening at Home
Introduction
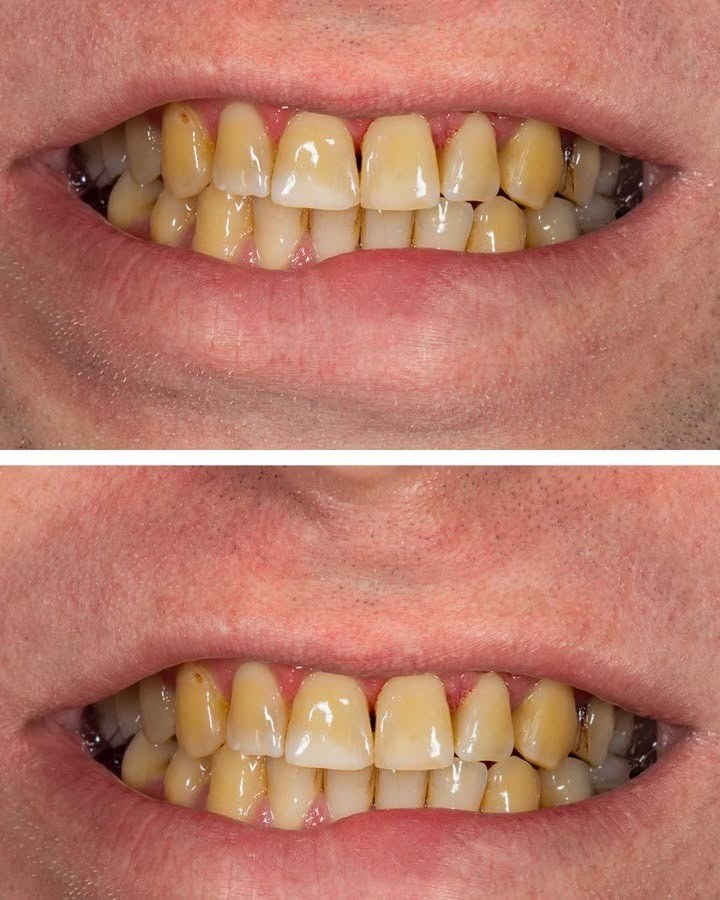
A bright, white smile is one of the easiest ways to boost confidence and leave a lasting impression. Many people spend hundreds on professional whitening treatments without realizing that safe, effective techniques can often be done at home.
This guide provides eight actionable, dentist-approved (and under-the-radar) methods to whiten your teeth, along with tips, precautions, and science-backed explanations. Think of it as a “culinary recipe” for your smile, where each hack is an ingredient contributing to a dazzling finish.
Ingredients
Before we start, gather your “whitening pantry”:
Soft-bristled toothbrush – Essential for gentle cleaning.
Toothpaste with mild abrasives or whitening agents – For daily polishing.
Baking soda – A classic home remedy.
Hydrogen peroxide (3%) – Acts as a mild bleaching agent.
Coconut oil or sesame oil – For oil pulling.
Activated charcoal powder – Optional, for adsorption of stains.
Fruits like strawberries – Contain natural acids and enzymes.
Apple cider vinegar – Used sparingly for deep cleaning.
Floss and mouthwash – To maintain oral hygiene.
Water – Preferably filtered, for rinsing.
Each ingredient must be used thoughtfully; overuse can damage enamel.
Step 1: Brush Like a Pro
1.1 Technique Matters
Use a soft-bristled toothbrush to avoid enamel wear.
Brush twice daily, for 2 minutes each session.
Use gentle, circular motions; avoid aggressive scrubbing.
Don’t forget your gum line—plaque near gums causes yellowing over time.
1.2 Toothpaste Selection
Choose a toothpaste with mild abrasives or enzymes that break down stains.
Avoid highly abrasive pastes; over time, these can erode enamel.
Brushing is your base layer, like flour in a cake—without it, whitening won’t stick.
Step 2: Baking Soda Hack
2.1 How It Works
Baking soda is mildly abrasive, removing surface stains.
It also creates an alkaline environment, inhibiting bacteria that cause discoloration.
2.2 DIY Baking Soda Paste
Mix 1 teaspoon baking soda with a few drops of water until it forms a paste.
Apply to your teeth with a toothbrush.
Brush gently for 1–2 minutes.
Rinse thoroughly with water.
2.3 Frequency
1–2 times per week is sufficient.
Overuse can erode enamel and increase sensitivity.
Think of baking soda as the polishing step in your recipe—gentle yet effective.
Step 3: Hydrogen Peroxide Rinse
3.1 How It Works
Hydrogen peroxide is a mild bleaching agent, breaking down stains and whitening teeth.
Concentration matters: Use 3% solution; higher concentrations can damage gums and enamel.
3.2 DIY Whitening Rinse
Mix 1 part hydrogen peroxide with 2 parts water.
Swish in your mouth for 30–60 seconds.
Spit out—do not swallow.
Rinse with water afterward.
3.3 Safety Notes
Limit to 2–3 times per week.
Overuse may lead to gum irritation or enamel sensitivity.
Hydrogen peroxide is your “active ingredient” in this recipe—think of it as the flavor-enhancing spice, used sparingly.
Step 4: Oil Pulling Technique
4.1 How It Works
Oil pulling uses oil to remove bacteria and plaque that cause discoloration.
Coconut oil contains lauric acid, which fights bacteria and reduces plaque.
4.2 Step-by-Step Oil Pulling
Take 1 tablespoon of coconut oil.
Swish it around in your mouth for 10–15 minutes.
Spit it into the trash (not the sink, to avoid clogging).
Rinse with warm water and brush afterward.
4.3 Frequency
Daily or every other day.
Oil pulling supports whitening, but it’s not a substitute for brushing.
Oil pulling acts like a slow-cooked marinade—time allows the benefits to penetrate.
Step 5: Activated Charcoal Hack
5.1 How It Works
Activated charcoal binds to surface stains and toxins.
It’s mildly abrasive and can remove discoloration from coffee, tea, and smoking.
5.2 Application
Wet your toothbrush and dip it lightly in activated charcoal powder.
Brush gently for 2 minutes.
Rinse thoroughly to remove all residue.
5.3 Safety Tips
Limit to 1–2 times per week.
Avoid aggressive scrubbing, which can erode enamel.
Activated charcoal is the “special garnish”—used sparingly for extra sparkle.
Step 6: Strawberry and Baking Soda Mask
6.1 How It Works
Strawberries contain malic acid, a natural enamel-safe bleaching agent.
Combined with baking soda, it polishes and brightens teeth.
6.2 DIY Paste
Mash 1 ripe strawberry and mix with ½ teaspoon baking soda.
Apply the paste to your teeth for 2–3 minutes.
Rinse thoroughly and brush afterward.
6.3 Frequency
Use once a week.
Overuse can wear enamel due to acidity.
Strawberries add the “sweet twist” to your whitening recipe—fun, natural, and tasty.
Step 7: Apple Cider Vinegar (ACV) Rinse
7.1 How It Works
ACV is acidic and can remove surface stains and bacteria.
Must be diluted to prevent enamel erosion.
7.2 DIY Rinse
Mix 1 teaspoon ACV with 1 cup water.
Swish for 30–60 seconds, then rinse thoroughly with water.
7.3 Safety Notes
Limit to 1–2 times per week.
Brush your teeth afterward to neutralize acid.
ACV is the “sharp seasoning”—powerful but must be handled carefully.
Step 8: Prevent Future Staining
Avoid stain culprits: Coffee, tea, red wine, dark sodas, and smoking.
Drink water after consuming staining foods or drinks.
Use a straw for colored beverages to reduce contact with teeth.
Maintain daily oral hygiene: Brushing, flossing, and mouthwash.
Chew crunchy fruits and vegetables: Apples, carrots, and celery act as natural teeth cleaners.
Prevention is the final layer in your recipe—without it, even the best whitening efforts can fade.
Bonus Tips for Faster Results
Consistency is key – Small, regular steps beat occasional intense treatments.
Avoid abrasive scrubs – They can erode enamel over time.
Whiten gradually – Rapid bleaching increases sensitivity.
Combine hacks wisely – For example, brushing → hydrogen peroxide rinse → oil pulling.
Maintain hydration – Saliva protects teeth and prevents stains.
Consult a dentist – Especially if you have sensitive teeth, fillings, or gum disease.
Think of these tips as the “chef’s notes” for perfecting your teeth whitening recipe.
Precautions and Safety Notes
Do not swallow any whitening agents.
Avoid prolonged exposure to acids or peroxide.
Stop immediately if you experience sensitivity, gum irritation, or enamel wear.
Home whitening is best for surface stains; intrinsic discoloration may require professional care.
Consult your dentist before combining multiple home remedies if you have dental restorations or enamel issues.
Safety is the secret ingredient—without it, no recipe works.
Summary – How to Combine These 8 Hacks
Here’s a sample weekly routine for optimal whitening results:
Day Hack
Monday Brushing + Baking soda
Tuesday Brushing + Oil pulling
Wednesday Brushing + Hydrogen peroxide rinse
Thursday Brushing
Friday Brushing + Strawberry paste
Saturday Brushing + Activated charcoal
Sunday Brushing + Apple cider vinegar rinse
Adjust based on sensitivity and personal preference.
Always rinse thoroughly after treatments.
Think of this as the “cooking schedule” for a sparkling smile.
Conclusion
Home teeth whitening doesn’t have to be expensive or harsh. By following this 8-hack recipe, you can:
Remove surface stains gradually and safely.
Brighten your smile with natural, accessible ingredients.
Maintain long-term oral health while enhancing appearance.
Discover lesser-known methods that most people—and even some dentists—don’t share.
Consistency, gentle care, and smart combinations of these hacks are the key to a radiant smile that says, “I never thought whitening could be this simple at home!”
Remember: whitening is a process, not an instant result. Patience and care will yield the best long-term glow.
